practicing jumping worm safety.

Good morning from the garden, and Happy Mother’s Day to all of you mothers out there (wait a minute, that sounded a little wrong)!

Earlier this week I mentioned having purchased some plants while out garage saling last weekend.  I have always been a big fan of what I call garage sale gardening.  So many of the plants in my garden came from garage sales, such as the Bigroot Geranium (or Geranium macrorrizum) that grows like mad in just about any conditions.

So when I saw some of the plants on my ‘wish list’ being sold for $5 each at a sale in Tangletown last week, I couldn’t resist.

For one thing, I found a Sweet Autumn clematis.  You may remember seeing this growing on the side of our carriage house (the vine with the little white flowers on the left below).

It was spectacular in the fall, but last spring it didn’t come back.  I find that this happens sometimes with clematis, possibly due to clematis wilt, I’m not really sure.

Anyway, I picked up a new one for $5 and we’ll try again.

But, that brings me to today’s q tip!Have you heard about jumping worms?  They are a non-native earthworm that strips the nutrients from top soil.  And according to Ramsey County they are an emerging problem in our area.  They can be introduced to your garden in mulch, compost and potted plants.

For that reason, I am now hesitating to continue recommending buying plants at garage sales because it puts you at risk of bringing home jumping worms.

However, garage sale perennials can still be a good bargain, so if you have jumping worms in your area (check with your local University Extension program if you don’t know) you should practice some jumping worm safety if you purchase plants at a garage sale, or even at a garden club plant sale for that matter.

Here are some recommendations from the U of M Extension:

  • Accept only plants from gardeners that have looked for jumping worms and use these practices to prevent their spread:
    • Plants and materials do not come from an area known to have jumping worms.
    • There is no reason, like soil that looks like coffee grounds, to suspect there are jumping worms at the site that produced these plants or materials.
  • Remove soil from all plants before transporting them to limit the spread of weeds and worms. This helps to remove earthworm cocoons (egg cases) or weed seeds.
  • Completely submerge plant roots in water and wash away remaining soil. Actively look for worms. Protect clean roots for transportation and sale.
    • Water is sufficient to remove soil and other materials from the roots.

I questioned the person I purchased plants from and she said they were not grown in soil from her garden, but in a potting medium (sorry, my eyes glazed over at the exact details).  So they should be jumping worm free.

OK, let’s move on from the worms.

The garden has just exploded over the last week, so I thought I’d share some of my favorite spots with you this morning.

Remember the tulips that the deer like to eat?

I saved a couple of patches of them by enclosing them with chicken wire and they look amazing right now.  Unfortunately, only a handful of the patch of 100 that I planted in fall of 2022 came back this year.  I had chosen Darwin Hybrid Pink Impression tulips specifically because that variety is one that will naturalize.  But apparently not for me.  However, I’d also planted 100 new ones this past fall and those look fantastic.

In the end, I have come to realize that I need to treat tulips as an annual in my garden, and an annual that has to be protected from deer at that.  I tell myself that they just aren’t worth it, but right now they look so good that I know I’ll be tempted to plant them again this fall!

The Double Sherborne Narcissus that I planted last fall are also looking good.  They add a bright pop of yellow next to the red carriage house.

I’ve mixed in some muscari (grape hyacinth) and I love the combination.

In the background of that photo you can see the azalea that I added a few weeks ago.

I can’t take any credit for all of those flowers since this shrub was already covered in buds when I purchased it at Home Depot.  This particular azalea is supposed to be hardy in zones 5 thru 9, and my area was bumped from 4b to 5a last year.  Will it survive our winter?  That remains to be seen.  I plan to protect it over winter for a few years until it gets established.

The Sugar and Spice tiarella (foam flower) that I put in last year is just starting to bloom.

As is the Raspberry Splash lungwort.

Aren’t those color gorgeous?

The star of the garden this week has to be the Phlox divaricata, or wild blue phlox.

It has created a lovely patch of bright blue.  I have it planted ‘under’ a Sun Power hosta.  You can just barely see the Sun Power in the early stages of emerging behind the phlox.

I love this combination because although the phlox looks gorgeous right now, after it blooms it looks fairly weedy.  But that’s when the hosta takes over and fills in the space and I just cut back the phlox.

Last, but certainly not least, the lilacs are just starting to pop.  We’ve had some cool nights recently (in the 40’s Fahrenheit), and I think that is slowing them down a little.

Also, I’m finding that they last a lot longer in a vase if I cut them before the flowers are completely opened up.

So tell me, do you have jumping worms where you are?  Have you gotten many plants at garage sales?  And what’s blooming in your garden this week?  Leave a comment and let me know.


no more government gray.

Bryn Mawr calls their neighborhood sale the Festival of Garage Sales, and with good reason.  There is definitely a festive atmosphere.  They have food trucks and porta-potties, which both say ‘festival’ to me.  They also have LOTS of people.  Even in the rain.

Parking can be a challenge, so our strategy is to bring some foldable carts with us, find a spot for the car, and then walk the alleys.  My sister employed her step counter and we logged just under 10,000 steps.

We managed to fill up our carts more than once, and here’s most of what I brought home with me.

My ‘find of the day’ is missing from that photo, but I’ll share that in a minute.

But otherwise, as you can probably see, I ended up with some more potential art for my gallery wall.

I really love this next watercolor, but I may have to hunt down a frame for it.

I also found a set of four mid-century prints by Jan Korthals.

Korthals was a Dutch artist, but these 4 prints feature London landmarks including St. Paul’s and Big Ben.

I also brought home a lovely set of poetry books.

The covers on these are just gorgeous, as are the colors.

I also nabbed a nice tacklebox.

I love the muted aqua colors on the little circular label on the front.

It’s even already a pretty blue color on the inside.

So now I’m torn.  Do I paint this one?  Or would someone buy it ‘as is’?  That is a pretty dull gray on the outside.  What do you think?

Speaking of ‘should I paint it?’, after the last sifter that I painted turned out so pretty, I decided to grab another sifter to paint.

After giving it a good cleaning, I gave it two coats of Dixie Belle’s Mint Julep, followed by a topcoat of their Big Mama’s Butta.

How perfect is it as a succulent planter now?

While I was at it, I also painted the postal scale that I picked up.  It was a very dull grey color originally, let’s call it ‘government gray’ since it’s a postal scale.  After giving it a good cleaning, I gave it two coats of the Mint Julep as well.

No more government gray!

For those of you who don’t know, I retired from my government job 2 1/2 years ago, so there’s definitely no more government gray for me.

I’ve already added some apothecary labels to the pair of amber bottles that I picked up.

I liked the simple lines of the silver pitcher that I purchased.  It will make a beautiful vase for peonies when they start blooming, but for now I filled it with some faux hydrangea that I also bought at Bryn Mawr.

I typically no longer pick up Ball jars unless they are either priced really low (I did get a pair of them with original zinc lids for 25 cents each in North St Paul), or they are unique in some way.

This one says “the Mason” on it, and it has some nice bubbles in the glass.  I’ll be adding it to my own non-collection of mason jars.

I’ve saved my ‘find of the day’ for last, and coincidentally it’s also the last thing that I purchased.  We were literally back in the car heading out of Bryn Mawr when I spotted a concrete dog garden ornament out of the corner of my eye.

Isn’t he handsome?  And he is also solid, ie. heavy, concrete.  I had to get my sister to help load him.  I was surprised that no one had snatched him up earlier in the day, and I can only conclude that he was just too heavy for anyone to tote around.

It feels great to be back out garage saling again!  I’ll be out again this Saturday at another of my favorite Minneapolis neighborhoods, Linden Hills.  So far the forecast calls for sunny skies and a high of 71°, wish me luck!

tulips in tangletown.

My friend opK and I held a garage sale marathon this past weekend.  We hit the sales on Thursday and Friday, and then on Saturday my sister joined us as well for the Bryn Mawr neighborhood sales.

Thursday dawned cold and rainy.  opK and I gathered up our rain gear and a list of addresses and headed to North St Paul.  I’d say out of our list of 25 or so sales, only about 10 of them had braved the weather and opened up.  We then headed to our hometown of Oakdale, and it was more of the same.  In desperation, we headed to Cottage Grove next.

All three of these towns were allegedly having their city-wide sales, but we found few sales.  Since the forecast for Friday was sunny and a high of 70, we figured most people had decided to hold off on opening up on Thursday.  I can’t say that I blame them, it was fairly miserable outside.

Here is the meagre pile of goodies that I brought home on Thursday.

That is nearly my entire haul.  I also purchased some peony cages for the garden, a set of old casters and a tall lantern that isn’t pictured, but that’s it.

The ‘find of the day’ from Thursday would have to be the little cast iron stove (it didn’t have much competition).

Isn’t that fun?  I thought it was possibly vintage until I looked it up online and discovered you can buy it at Walmart.  LOL, well, I only paid $1.50 for it, so I don’t feel too bad about it.

I woke up on Friday to glorious blue skies.  The Tangletown neighborhood in Minneapolis is one of my favorites, and that’s where we were headed.

I had to stop and get a picture of this gorgeous terraced hillside garden full of tulips that we spotted while twisting around on the Tangletown streets.  My photo doesn’t do it justice, it was gorgeous.

We also had much better luck with the finds in Tangletown.

The chair on the right was from a ‘free’ pile.  The cane seat is ruined, but that’s OK because I’m planning to turn it into a planter chair.  I’ve done a few of these in the past (check them out here).  My only regret is that I didn’t take more of the free chairs that were in that pile, there were several to choose from.  What was I thinking?  I could have made multiple planter chairs!

I also brought home a vintage Joy of Cooking, a nice globe, and an ironstone chamber pot.

Obviously no one needs a chamber pot for its original use these days, but they are lovely filled with flowers.

I also picked up this pretty amethyst colored glass bottle on Friday.

I thought the color was pretty, and I was drawn to the ‘antique’ look of it.   But don’t be fooled, much like the cast iron stove, this one isn’t authentic either.  I found info online that says it’s a 1970’s reproduction and only worth between $3 and $5.  Lucky I only paid $1.

I picked up this small enamelware tray and have already added a simple re.design with prima transfer to it.

I also found a couple of possible additions for the art wall in my q branch (a.k.a. my home office) starting with this pretty little mountain scene.

I’ve already found the perfect spot for it on my wall.

I’ve decided the 2nd oil painting I brought home is just a bit too bright for me.

This one came with a story.  The woman selling it said she bought it at a charity auction when she lived in Washington D.C., and supposedly it originally belonged to one of the Kennedy’s.  I can’t quite read the signature at the bottom, so I haven’t been able to find any pertinent information about it online.  Was someone just spinning a yarn to earn more funds for the charity?  I guess we’ll never know.

There were three good candidates for ‘find of the day’ from Tangletown.  First up there was the St. Francis statue.

You gotta love a good garden statue, right?  I plan to give him the rusty treatment using Dixie Belle’s patina paint.

There was also the Japanese maple tree.

I’ve been passing these by at the nurseries for years because of their high price tag.  I rarely see one for less than $100.  And they are an iffy proposition in my formerly zone 4b, now zone 5a garden.  So I’ve never wanted to spend a lot of money on a plant that may or may not survive the winter here.  But this one was $20, so I snatched it up.

Sure, it’s small.  But I’m going to try growing it in a pot on the deck.  That way I can move it to a more protected area for the winter.  We’ll see what happens.  If it dies, I’m only out $20.

I did also pick up a few other plants in Tangletown, but I’m going to share more about that in my ‘sunday mornings in the garden’ post this week, so be sure to stay tuned for that.

In the end, I have to give ‘find of the day’ status for Tangletown to this little cupboard.

That’s a beveled mirror in the oval, FYI.  This is going to be a fun one to paint up!

As for day 3 of our garage sale marathon, we were back to cooler temps and rain as we headed out to another of my favorite Minneapolis neighborhoods, Bryn Mawr.  But I’m going to share more about that one in my next post, so be sure to stay tuned!

But first, let me know, what would you have picked as ‘find of the day’?

decisions, decisions.

Back in May of 2022, I purchased this watering can at a garage sale.

I called it my find of the day at the time because I was looking for a functional, yet vintage, watering can.  Most of the vintage watering cans I have don’t hold water anymore and this one did.  Plus it had that nice big spout.  I mainly wanted to use it for fertilizing my annual pots with a water soluble fertilizer like Miracle Grow.

It did work quite well for all of gardening season 2022, but when I pulled it out last summer I found that it had sprung a leak.  Drat!

Since it’s now suitable as decor only, I decided to go ahead and give it a makeover and then add it to the growing pile of stuff for my occasional sale.  But that was just the beginning of the decision making process.  Next I had to decide what treatment to give it.

As you probably know, I’ve painted quite a few watering cans in my day.

My all-time favorite painted watering can is this one …

But technically I didn’t paint it.  It already had chippy white paint when I bought it, but I added the smaller version of the IOD Petit Rosier transfer to it.  I’ve hung onto this one because I love it so much.  I would have loved to do this same look on today’s watering can project, but I don’t have another of those transfers.  Although it is a retired design, you can still find them online with prices ranging from $17 (plus shipping) to as high as $30 (with ‘free’ shipping), but I just didn’t think I could sell the watering can for enough to make that purchase worthwhile.  Plus, I have so many other options on hand, I really need to use what I have first.

So I next considered adding a more simple transfer to the watering can, like this one …

That’s one of the Classic Vintage Labels from re.design with prima, and I do have one of them left in my stash.

That would have been lovely for sure, but then the watering can that I added the I.O.D. Rose Chintz paint inlay to caught my eye.

That’s another one that I’ve kept for myself.  It lives in my pantry along with some of my other favorites.

I pulled out my Rose Chintz inlay to make sure I had enough left to do both sides of the watering can, and sure enough I did.

But that led me to another decision to make, what color to paint the can?  I did consider Dixie Belle’s Sea Glass, which is the color on the watering can that I kept.  But I wanted to do something different.

I’ve used the Rose Chintz paint inlay over a number of colors, naturally including Dixie Belle’s Drop Cloth.

I also loved it over Dixie Belle’s English Ivy.

It also worked well over their lighter green shade called Kudzu.

I even used it over their Cobalt Blue, which was lovely.

And I loved it over the Cottage Door color too …

But then I remembered the black toolbox that I used it on way back in October 2022.

Now that was gorgeous!  It really pops over black.

So, black it is.

After giving the watering can a good cleaning, I gave it two coats of Dixie Belle’s Caviar.  Then I applied the paint inlay into a fresh 3rd coat of paint (for full instructions on applying a paint inlay click here).

I absolutely love how the inlays have a distressed sort of look, they aren’t perfect … and they aren’t meant to be.

I’d be tempted to add this one to my own non-collection of watering cans, except I already have one with the Rose Chintz paint inlay on it.  So this will be making its way into the pile of stuff for my upcoming sale.

What do you think?  Would you have gone with black, or would you have chosen a different color?  Leave a comment and let me know!

garage sale season is here!

It’s finally here!  Garage sale season!

I’m so excited to get out there and see what I can find this year.

For those of you who may be new here, I live in a suburb of the Twin Cities (that’s Minnesota, in case you didn’t know).  Our garage sale season probably starts a bit later than most.

And definitely quite a bit later than at my mom’s house in the Vegas area.  While my sister and I were out visiting her a couple of weeks back we stopped off at a handful of garage sales.  I have to say, they were pretty bad.  For one thing, apparently people don’t bother to price stuff at garage sales out there (one of my pet peeves, I hate having to ask for a price on every item I look at).  For another, apparently they have a lot of outdated electronics and office supplies that they think people will buy at a garage sale.

I’ll admit, sometimes the garage sales around here are just as bad, but sometimes they can be pretty fab.

Here’s an example from last week …

Now, I have to admit, I didn’t actually purchase any of the items shown above because they were just a little out of my re-sale price range.  If I personally collected vintage thermoses or buffalo check items I would have been all over them.

My friend opK and I spotted those fun vintage camp items when we went to a handful of sales last week just across the border in Wisconsin.  Although I didn’t buy any of those, I did come home with a handful of goodies.

I was initially thinking I’d leave the galvanized scoops ‘as is’ …

but in the end I decided to dress them up just a little bit.

I simply added some wording from the old I.O.D. Label Ephemera transfer.

I purchased the big bouquet of faux lavender because I’m always on the hunt for good florals for staging pieces like french floral buckets, or vases.

At $5 for the whole bunch, they seemed like a pretty good deal.

opK spotted the little toolbox for me.

Its petite size made it perfect for the daisy transfer that I used on a lockbox a month or two ago.  I liked that one so much that I wanted to do something similar again.

I think it turned out rather sweet.

As for the shiny bucket, I gave it the same treatment as a bucket I painted a month or two ago.  After giving it a good washing, I stippled on a coat of Dixie Belle’s Dried Sage paint mixed with their Sea Spray texture additive.  Once dry, I sanded it back a little to take some of the peaks down then added two coats of Drop Cloth.  Once that was dry, I sanded it a bit as well to allow some of the Dried Sage layer to show.

I painted the interior of the bucket in Dixie Belle’s Deep Sea just to clean it up a bit.

Plus, the deep dark blue worked beautifully with the dark blue of the re.design with prima transfer I then applied to the front of the bucket.

I did also pick up this small wooden box while out garage saling in North Hudson.

I’ll be honest, I only grabbed it because it was only $1 and I thought I could give it a quick makeover for my sale.

I gave it two coats of Bonding Boss to block any stains from that orange-y wood, then gave it two quick coats of Dixie Belle’s Drop Cloth.  Once dry, I decorated it with some scraps from I.O.D.’s Redoute II transfer.

I followed it all up with some clear wax to finish.  It would be perfect for a small jewelry or trinket box.

This coming weekend we are spoilt for choice as the garage sale season kicks off with a bang in my area.  The cities immediately surrounding me of Oakdale, Maplewood and North St. Paul are all having their city-wide sales this weekend.  In addition, a couple of my favorite neighborhood sales are this weekend; Bryn Mawr and Tangletown.  Finally, there is also the 100-mile garage sale that runs along the Great River Road from Hastings to Winona.

So many options!  We can’t possibly get to them all, but here’s hoping I find lots of great stuff no matter where we end up.

impatiently waiting.

Good morning from the garden!

I know it’s only late April, but I have been patiently waiting all winter for spring to arrive.  Since returning from my mom’s house, where it was in the 80’s and sunny, I’m officially now impatiently waiting.

I’ve also been watching many of my favorite garden YouTube channels (Garden Answer, Hello Garden, The Impatient Gardener and Dig, Plant, Water, Repeat), and most of them are far ahead of my formerly zone 4b/now zone 5a garden.  With the exception of The Impatient Gardener, because she’s in Wisconsin.  But I have a serious case of spring garden envy when I see these videos with hostas already completely leafed out, crabapples in full bloom and masses of tulips and daffodils flowering.

I’ve done pretty much all I can in the garden for now until I can plant annuals, which around here is not until mid-May at the earliest.  However, our average last frost date is May 21, and the official recommendation is to wait until the last week of May to plant.

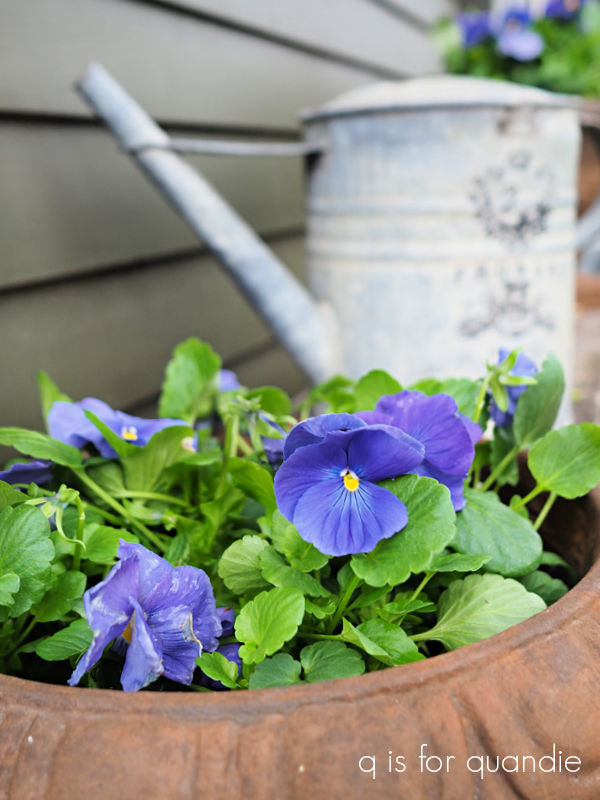
I rarely follow that advice though.  I definitely can get some pansies in way before that, which is why I went ahead and planted some up this week.

Pansies are pretty cold-tolerant so they will be OK unless we get below 20 degrees or so.  If I see any cold nights in the forecast, I can just cover them up with some old sheets to protect them a bit.

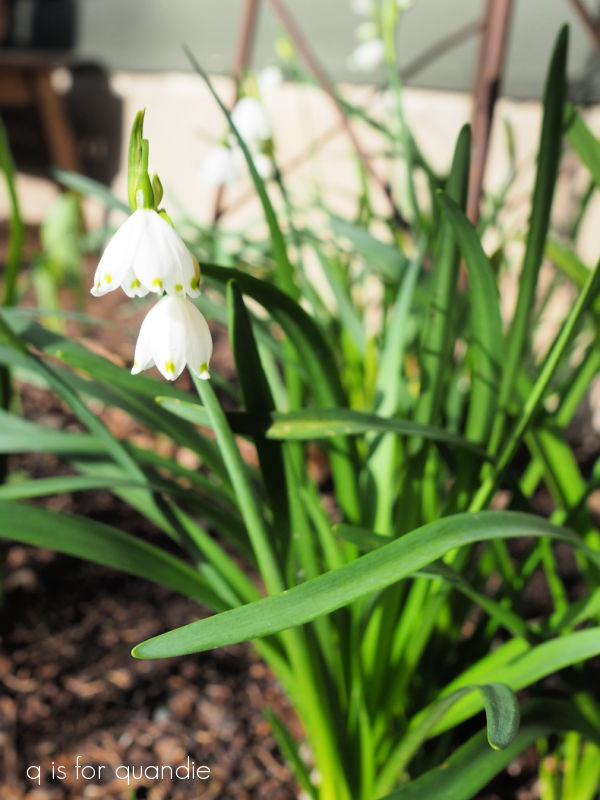
There are a handful of bulbs blooming in my garden already too.  Remember those leucojum’s I planted last fall?

They’ve come up and are pretty sweet.  I’m hoping that they multiply for next year.

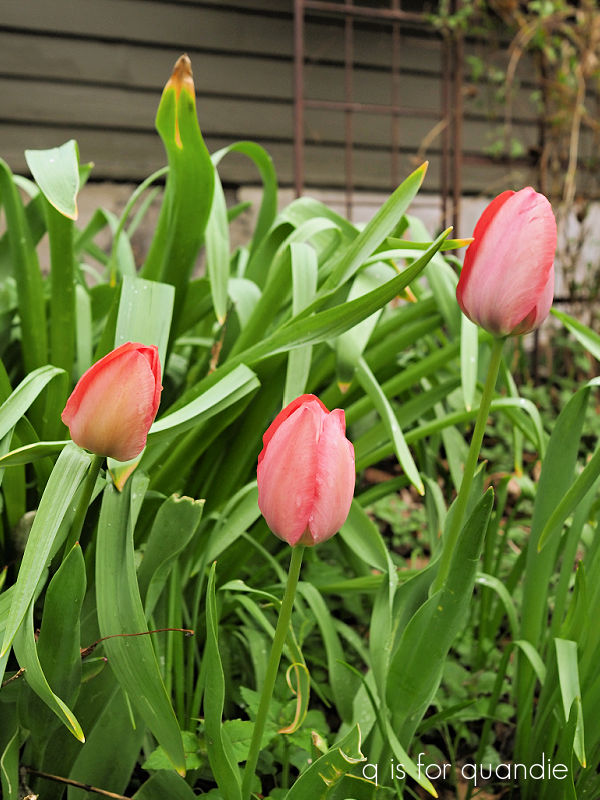
They’ve turned out to be deer resistant too, which is nice.  Especially since once again the deer have munched most of my tulips down to the ground.  I have a couple of groupings that I managed to protect with chicken wire, but the deer got to all the rest.  Please remind me to quit trying to grow tulips, it’s just not going to happen for me.

That being said, I have a handful of tulips that the deer missed that are blooming now …

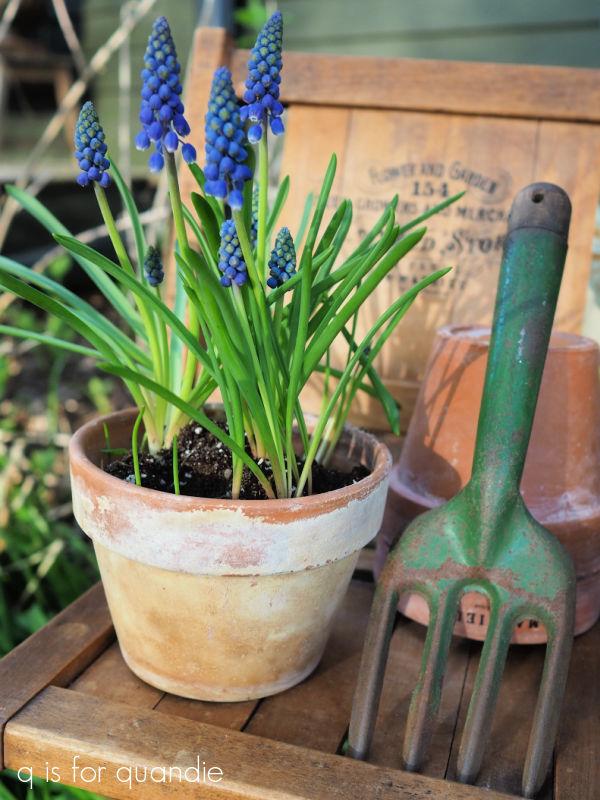
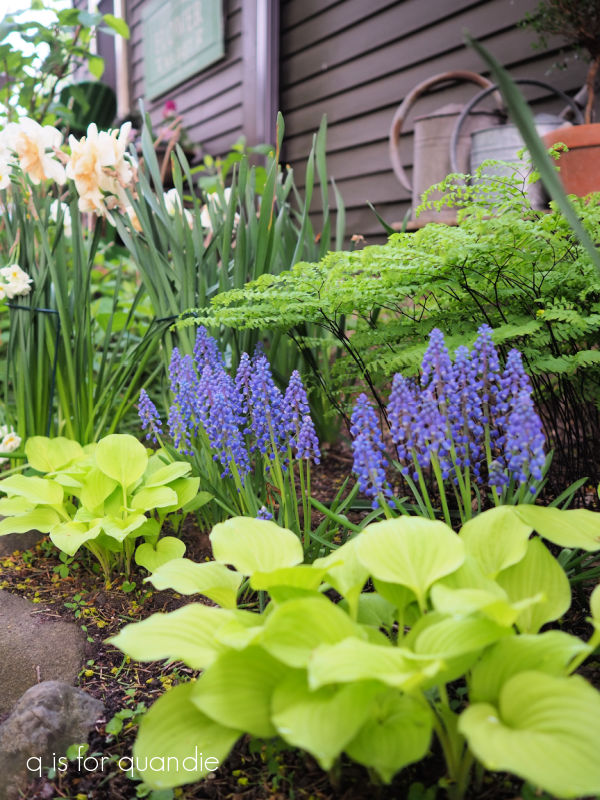
It looks as though grape hyacinths are also a safe bet.  I was pretty excited to see them coming up and blooming for me.

You may remember that I purchased them already potted up and blooming in about mid-May last year.

After using them as a photo prop, I decided to pop them in the ground and see what happened.

They were perfect right between my Maiden Hair ferns and those small lime green hostas (that I don’t know the name of).

Unfortunately, their normal bloom time appears to be much earlier than mid-May (ie. now), and the hostas and ferns are barely even out of the ground yet.  So the grape hyacinths stand alone this year.

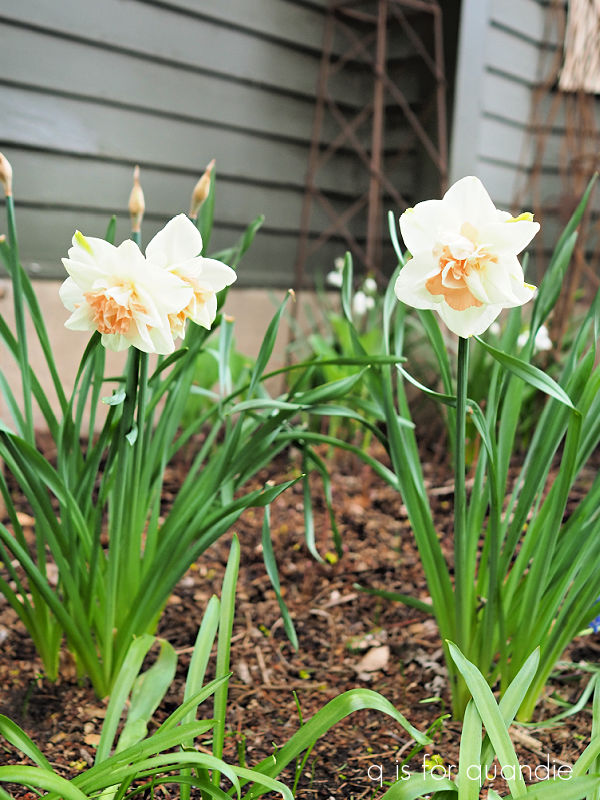
I have just one variety of daffodil blooming this week …

The rest of the daffodils in the garden are up, and they have buds, but they seem far from opening.

Daffodils are also deer resistant, so maybe I need to add more of them this fall as well.

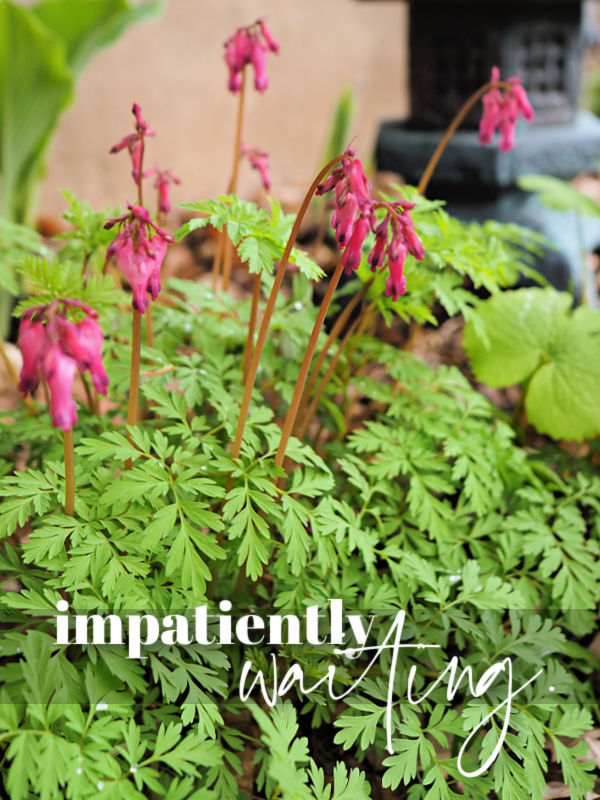
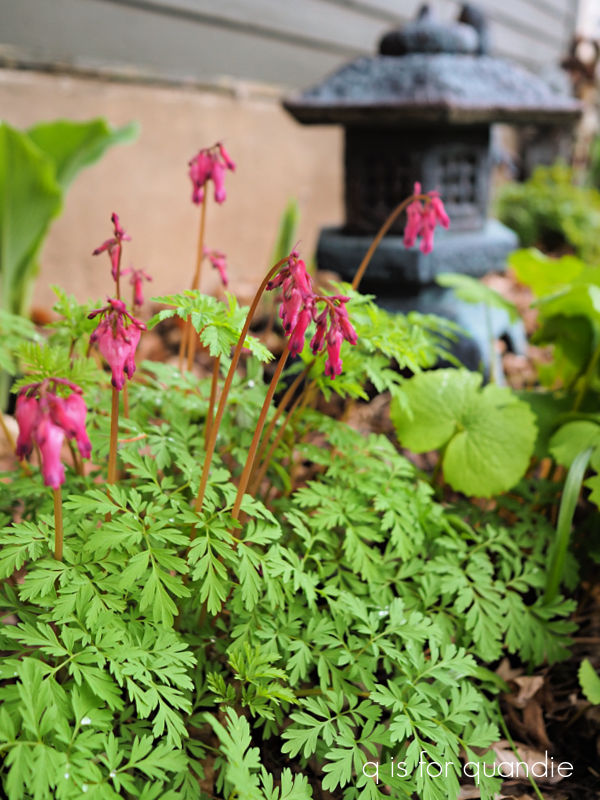
I do have a few perennials that are already blooming including variegated vinca and bleeding heart.  My fern-leaf bleeding heart is particularly pretty right now.

This type of bleeding heart is a workhorse in the garden because it will keep blooming all summer, unlike the more traditional bleeding heart which blooms early and then pretty much dies back and looks terrible for the rest of the season.

Maybe I should quit feeling sorry for myself.  My gardens may not be completely up and filled out yet, but they are getting started.  What’s up and/or blooming where you are?  Leave a comment and let me know.

super simple makeovers.

Today I’m bringing you several super simple makeovers.  None of them felt ‘big’ enough to deserve a blog post of their own, but all of them felt worth sharing in some fashion.

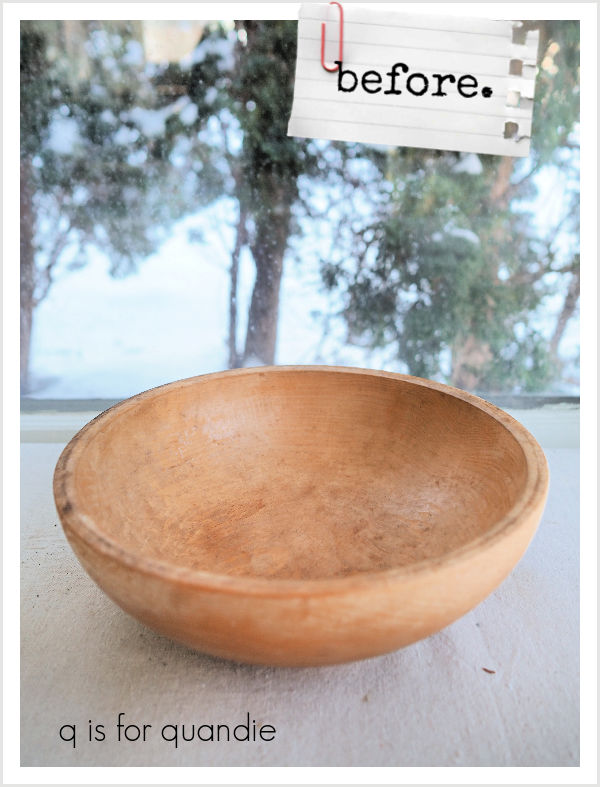
Let’s start with this wooden bowl that has been in my stash for a while.

I’d been hanging onto it because you just never know when you might need a wooden bowl to corral some items, like some vintage croquet balls for example.

I don’t actually have anything to put in the bowl just yet, but I really wanted to paint it in my favorite blue milk paint, Soldier Blue from Homestead House.

I love this gorgeous vibrant shade of blue.

To prep the bowl I scuff sanded it lightly all over and then simply wiped it down with a damp rag.  To be extra cautious about chipping I could have washed it well with Dawn dish soap and hot water, but I was willing to take my chances with this one.

Next up, I simply gave it two quick coats of Soldier Blue.

Once the paint was dry, I sanded lightly again and then added a topcoat of Dixie Belle’s Howdy-Do Hemp Oil.

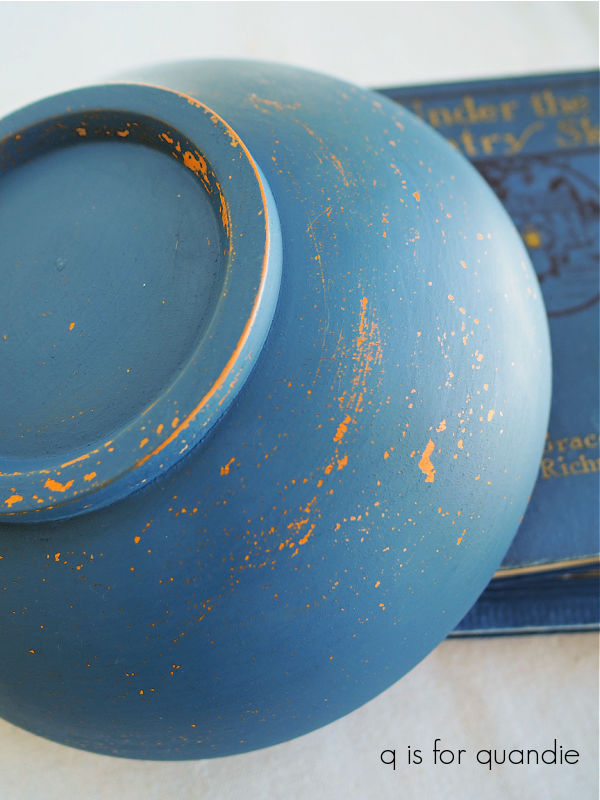
I got the perfect amount of chipping, and ended up with this gorgeous blue bowl!

Hopefully I’ll come across something to put in it while out garage saling or thrifting.  This weekend kicks off neighborhood garage sale season in my area, so fingers crossed that I find some good stuff!

But meanwhile I just staged it up with an ironstone pitcher and some vintage books in almost the same shade of blue.

Next up is a vintage flour sifter.  Now, I have to confess, I hadn’t really planned on sharing this project so I didn’t take a good ‘before’ photo.  However, I did dig up this old photo and the sifter in question is the one at the back with the green knob.

I thought this particular sifter was rather boring though, so last Christmas I added one of I.O.D.’s holiday themed transfers to it without first painting it.  I disliked that look immediately however, so it got shoved back into the ‘makeover’ pile.

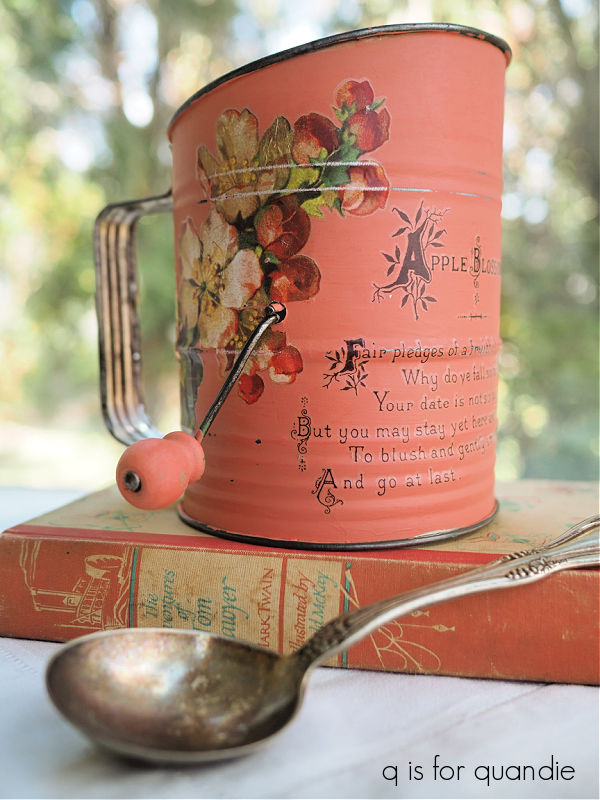
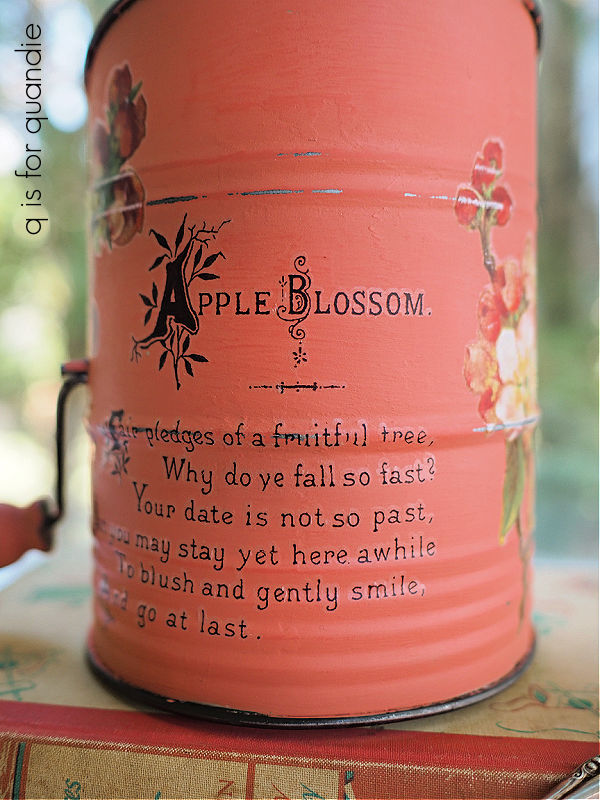
I pulled it out the other day and used a heat gun and a razor blade to remove that Christmas transfer.  Then I painted the sifter in Dixie Belle’s Cottage Door.  Once the paint was dry, I sanded lightly to distress and then added some apple blossom transfers from I.O.D.’s Lover of Flowers set.

Oh my gosh, I just love that color.

And if you take a moment to actually read the little poem, it’s perfect.

Why do those apple blossoms fall so fast?  I do wish they’d stick around a bit longer.

Next up I have another cupboard door sign for you.  I’ve had a stash of cupboard doors in my workshop for a while now, so I’m going to try to get through them all before my sale.

This particular look was inspired by a project I saw on the Ginger Chick Rehab YouTube channel (you can find that video here).  She painted a small dresser using Sweet Pickins milk paint in a color called Curry.  Then she added some florals from the new I.O.D. Collage de Fleurs transfer …

followed by a Funky Junk stencil.  Now, I have to admit, I never would have thought to put these florals over a mustard yellow on my own.  But it worked beautifully on Yvonne’s dresser, so I decided to give it a go.

Although I didn’t have the Sweet Pickins milk paint, or the Funky Junk stencil, I had a couple of substitutions on hand that worked quite well I think.

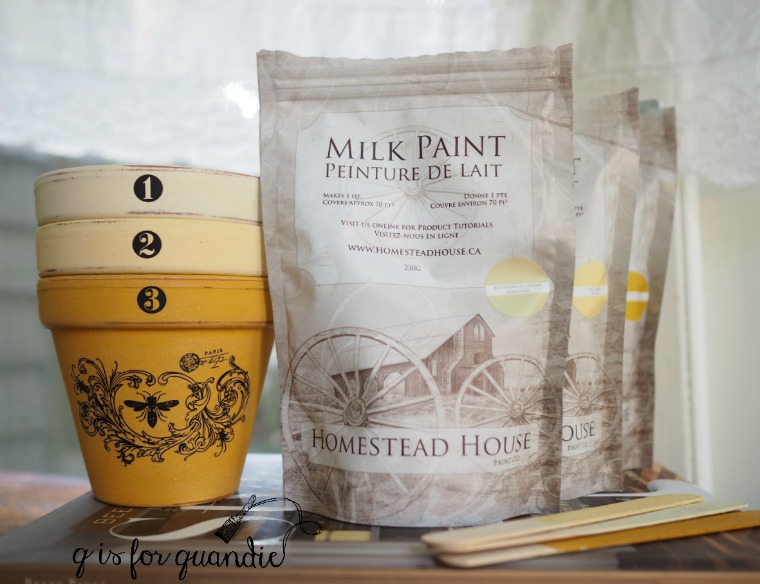
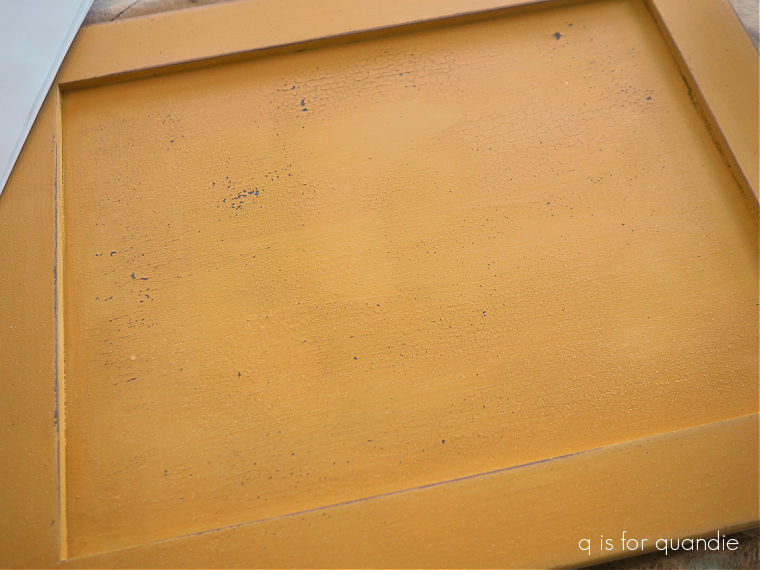
First up, I gave my cupboard door a base coat of Dixie Belle’s Coffee Bean.  Then I mixed up some Homestead House milk paint in a color called Garden Seed.  I’d used this color once before when experimenting with shades of yellow for a Jenny Lind bed frame I was painting (it’s the color on the bottom pot, no. 3).

After applying a couple of coats of the Garden Seed, I used my heat gun to encourage a little crackling.

Next I chose a few florals to add.

I stayed away from the darker red versions, using mostly creamy or pale pink blooms.  I very lightly sanded over the transfers with 220 grit sandpaper to make them look a bit more aged to go along with the crackled paint.

Finally I added a simple Fresh Cut Flowers stencil in more of DB’s Coffee Bean.

I feel like I’m taking a bit of a risk with this one.  It’s far from neutral, isn’t it?  And shades of yellow have always been hit or miss for me when it comes to sales.  But it was a fun project and hopefully someone will give it a new home.

Last up, while I had the Fresh Cut Flowers stencil handy, I decided to add it to a small chair.

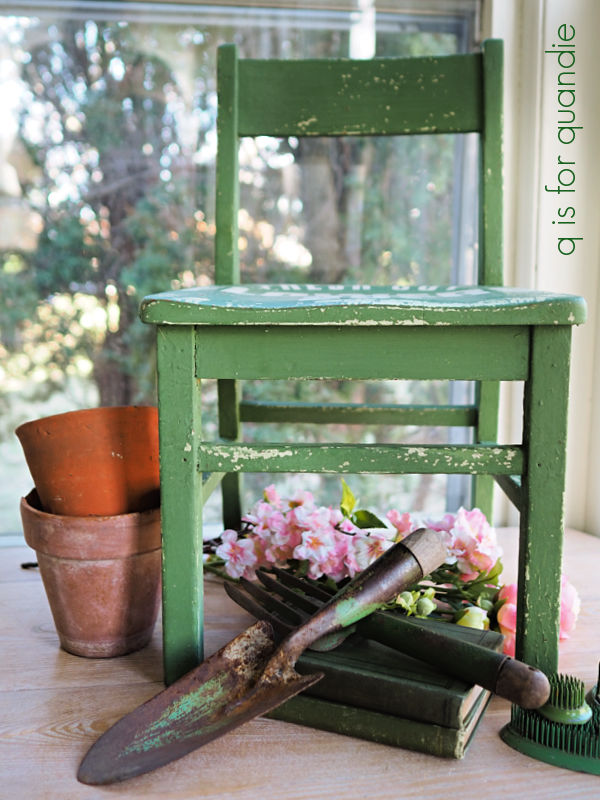
This chair was one of my friend Sue’s finds.  While I loved the authentically chippy paint finish, the color was quite dirty and dingy.  After attempting to just clean it up with the help of a Magic Eraser, I ended up deciding it needed a refresh with some paint.

So I pulled out the In a Pickle milk paint from Sweet Pickins and applied two coats to the chair.

I then added the stencil to the seat using DB’s Drop Cloth.

As you can see, I still got plenty of fresh new chipping!

It’s a little hard to judge the size of this chair from my photos.  It’s a bit smaller than the usual kid sized chairs I paint at 21.25″ tall x 12.5″ wide x 11.5″ deep.

I finished it off with a coat of clear wax.

There is one element that unifies all 4 of these small projects, color!  None of them are painted in my typical neutral shades.  Clearly I felt the need to inject a little color into my world recently, lol.  How about you?  Do you like to add a bit of color, or do you usually stick to neutrals?  And which of these 4 projects is your fave?  Leave a comment and let me know.

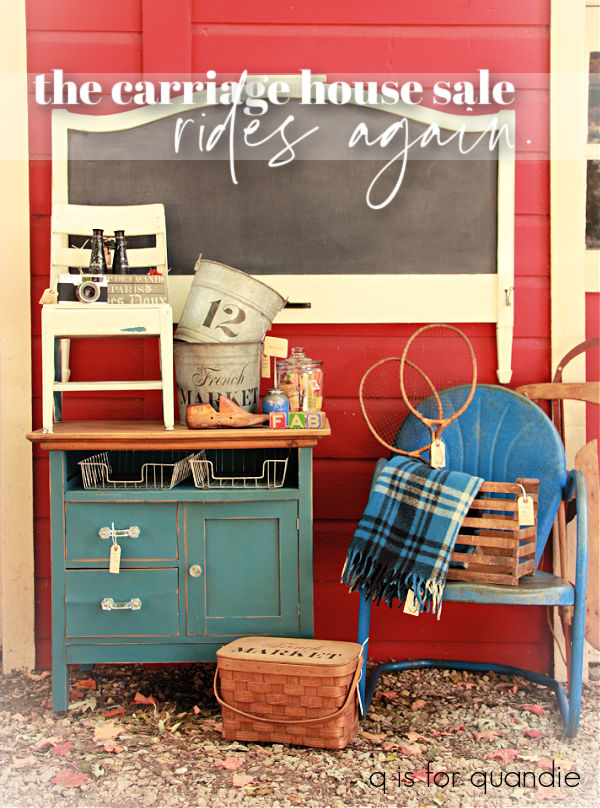
the carriage house sale rides again.

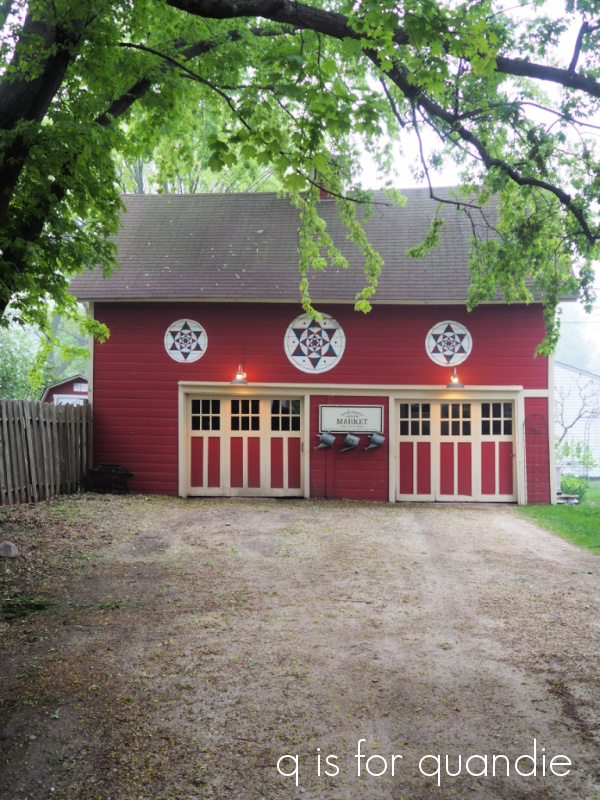
Ever since I retired two years ago (well, technically two and a half, time flies!) I’ve been thinking about resuming the occasional sale that I used to hold here in my carriage house with my friend Sue.

We held sales here for years.  We started on a very small scale in the late 90’s, in fact it was really more of a garage sale in the very early days.  We kept at it until 2016.

But it really became too much for me to have a full time day job, plus the furniture painting (I was doing a lot more of that then) and blog writing, plus the sale twice a year (some years we even held three sales!).

In addition, my workshop is in the carriage house in the summer, so having a sale meant completely gutting my workshop and setting up the sale, and then once it was done, returning everything to working order in the workshop.

Not only was it a lot of work, but it also meant that my workshop was out of commission for 4 weeks or so for set up and take down (since I really only had time on weekends and evenings to work on it) …  twice per year.  And I can really only use my workshop from May through September, so that really cut into my workshop time.

The sale had also grown over the years.  By the end, we had the carriage house full, plus lots of stuff outside.

We had a couple of tents, but most of the stuff was out in the open which got a little dicey if the weather wasn’t good.

Like the time the tornado sirens went off just as we opened up!

We experimented with a few extra partners over the years, and with adding things like a bake sale.

The baked goods were fun, but I think I was their best customer!

We added perennials divided from our own gardens a few times too, with mixed results.

Back in 2016 I was doing a lot of furniture, and it was selling really well on Craigslist.  In contrast, furniture never did terribly well at my occasional sales.  So I decided to give up the Carriage House Sale.

I continued selling my furniture online, and I started selling my smalls at a shop on consignment.

But these days I’m not doing so much furniture, and although selling through a shop has worked out really well for me in the past, it has limitations.  Somehow over the past few years I’ve accumulated a fair amount of stuff that just wasn’t the right fit for the shop.

That led me to think that maybe I should resume my own occasional sale.

I’m a little bit nervous about it, it has been 8 years since my last last after all.  What if I’ve forgotten how to do it?

I reached out to my friend Sue, and she jumped on board.  She’s also retired now and has more time for hosting a sale.  I have to admit, I was relieved when she said yes because she always had great stuff!

Plus we have a very similar aesthetic.

So, the Carriage House Sale rides again.  We’re tentatively planning on having the sale on June 21 and 22 (or thereabouts), so you locals should mark your calendar!

Luckily I have a couple of months yet to pull together my ‘inventory’, and I’m sure you’ll see lots of projects here on the blog that will be earmarked for the sale (although, as always, if any of you locals are ever interested in a particular item when I post about it you are welcome to reach out ahead of the sale, just email me at qisforquandie@gmail.com).

the clock case project.

Oh my gosh you guys, this one has been around for a long time.

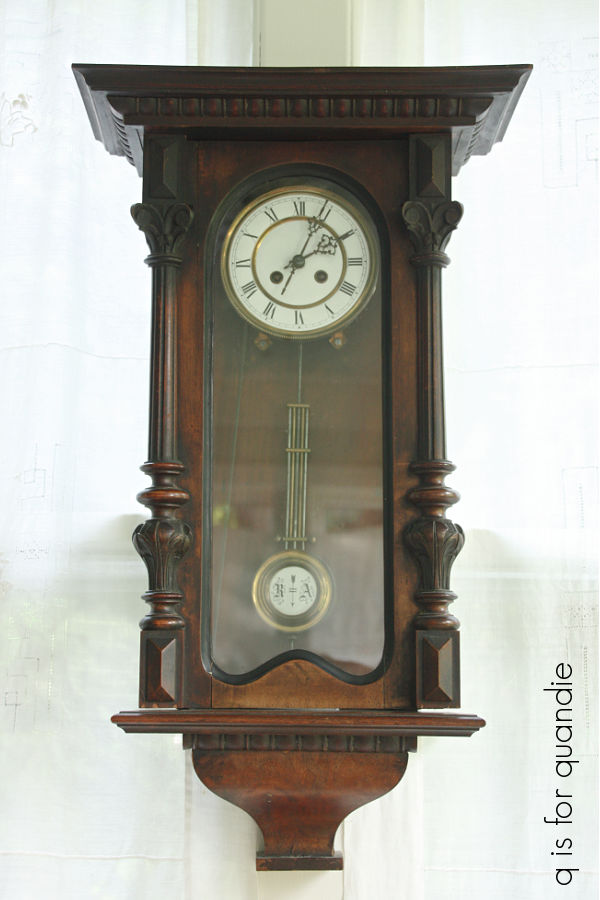
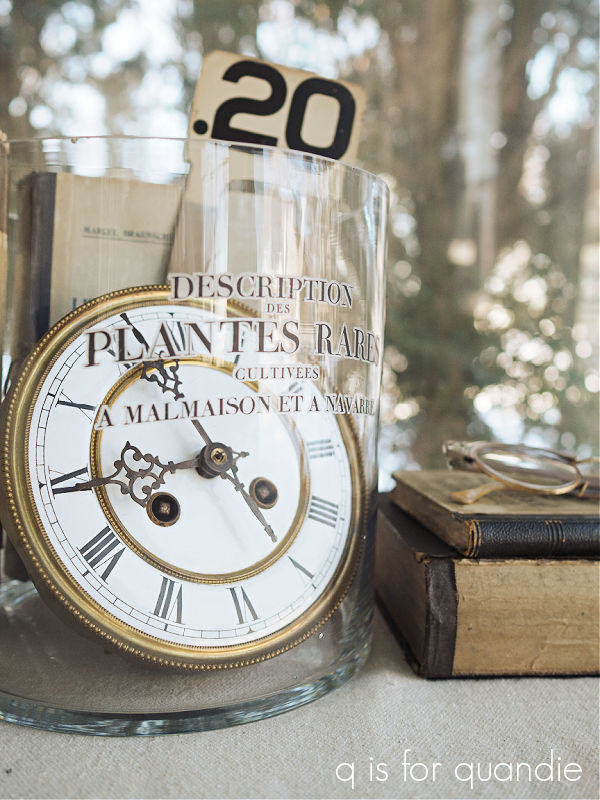
I purchased this clock more than 5 years ago.  I paid $5 for it at a garage sale.  It was going cheap because it didn’t work.

I mainly purchased it for the case.  I planned to gut it and turn it into a little hanging display case of some kind.

But for some reason it became one of those projects that I never quite got around to sharing here on the blog.  I did eventually remove the clock parts, and I sold some of them separately.

Then I asked Ken to add a little shelf inside the case.  Next up, I painted it in Fusion’s Little Black Dress milk paint.

I added some Eiffel Tower paper to the back and filled it up with some clocks and silver salt and pepper shakers.

But I didn’t love it.

I think I just wasn’t feeling the black, and I also really wanted this piece to be crackled and chippy.  But for some reason I didn’t get any chipping out of that black milk paint.  So I tucked the clock case away for another couple of years.  I finally decided to give it another go a few weeks ago.

But this time I also decided to try adding some heat.  If you aren’t familiar with this technique, you can use a heat gun to dry your milk paint quickly which can promote crackling and/or chipping.

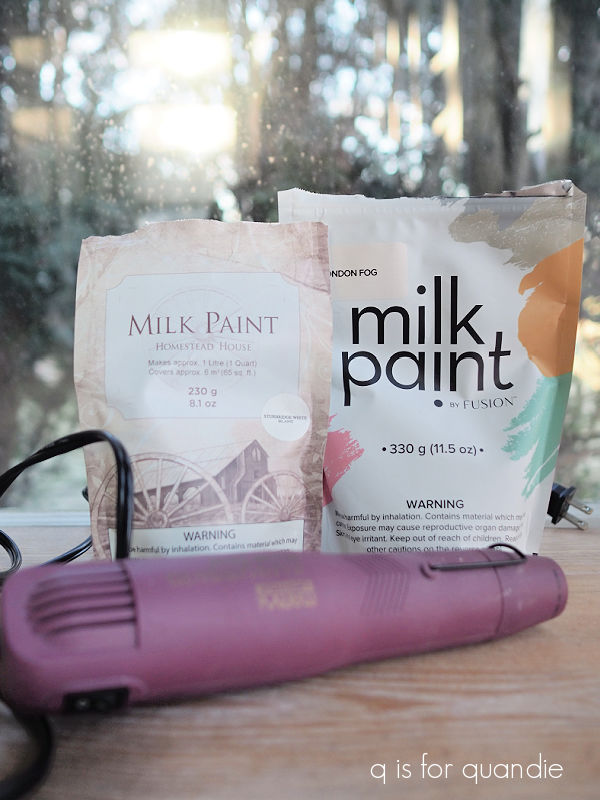
I had two shades of white on hand, Homestead House Sturbridge White and Fusion London Fog.  The Sturbridge White is too white for me, but the London Fog is too creamy, so I mixed them to create the perfect off-white.

I mixed my paint up on the thicker side (because that tends to aid in crackling as well) and tested it out on the bottom part of the clock case.  Once the paint was on, I hit it with the heat gun for a minute.

It started to crackle beautifully, so I turned off the heat gun and gave it a couple of minutes to dry.

And … well … you can see the results.  It started chipping.  A lot.  Too much.  Eventually almost all of the paint came off.

I suspect that’s because I had added a hemp oil topcoat over my black paint back when I first painted it (more than a year ago).  Theoretically you can paint over hemp oil once it is cured, which takes about 4 weeks.  That would probably work if I was using a chalk style paint, but not so much with a milk paint.  Fusion recommends that you give hemp oil several months to cure before painting over it with their acrylic paint.

So back to the drawing board.

I had a couple of options at this point.  I could remove the hemp oil using mineral spirits or rubbing alcohol.  I could paint over the hemp oil with a chalk or acrylic paint first, and then follow that up with the milk paint.  I could add bonding agent to my milk paint, but then I probably wouldn’t get the crackling that I do want.  I could also try scuff sanding the clock to rough up the surface, I’ve had that work fairly well in the past.  So I went with that approach.

Once I had it the clock case sanded down, I decided to thin out my milk paint a little too.  Just to hedge my bets.

I repainted with two coats of the milk paint, and I still got quite a lot of chipping.

Too much chipping for you?  I get it.  This look isn’t for everyone, but I was creating this piece for myself and I still happen to love a chippy finish.  So I decided to just go with it.

Rather than sanding the final coat of paint (which definitely would have taken even more of the paint off), I brushed it lightly with a dry cloth and then vacuumed away any really loose paint.  Then I very gently brushed on three light coats of Dixie Belle’s Flat Clear Coat.  It will act as a sort of ‘glue’ to hold the rest of my chippy paint in place.  This will work on a piece that doesn’t get a lot of wear, but if it gets handled at all you’re still going to lose paint.  In addition, the surface is very rough to the touch, so that’s something to keep in mind.

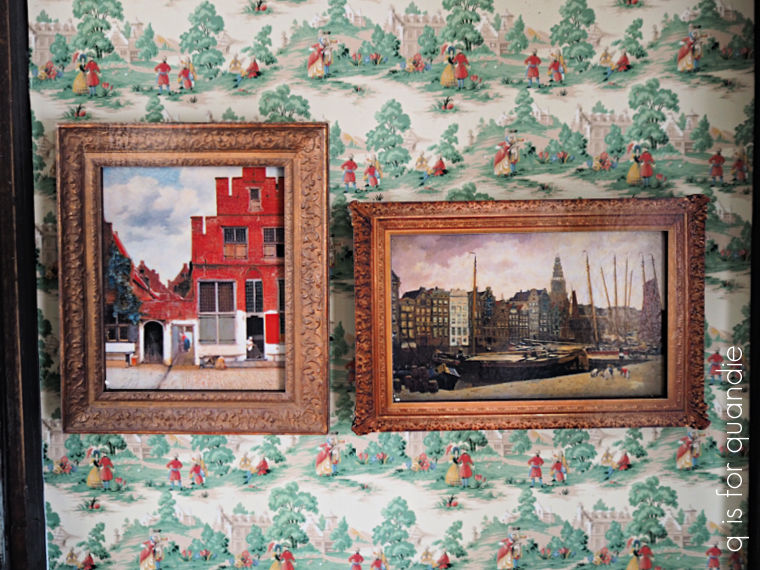
Now for the fun part!  As I mentioned in my last post, this project was inspired by my visit to the Rijksmuseum and all of the fabulous miniatures that I saw there.  I purchased three miniature ‘painting’ magnets in their gift shop including one of my favorite Vermeer, The Little Street.

And I needed somewhere to hang them.

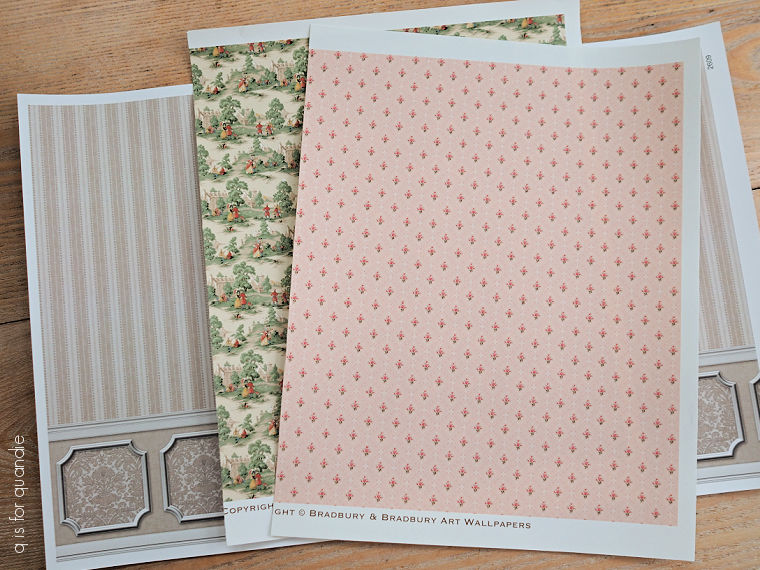
I ordered some miniature wallpaper from the same Etsy vendor where I purchased the barn lights for my miniature barn makeover.

There were so many pretty ones to pick from that I had a hard time deciding.  They were all less than $10 each, so I ordered three different ones to give myself options.  I have already cut up the two I ended up using in the photo above.  There is enough left of each that I could change my mind later and wallpaper both levels the same if I want to.

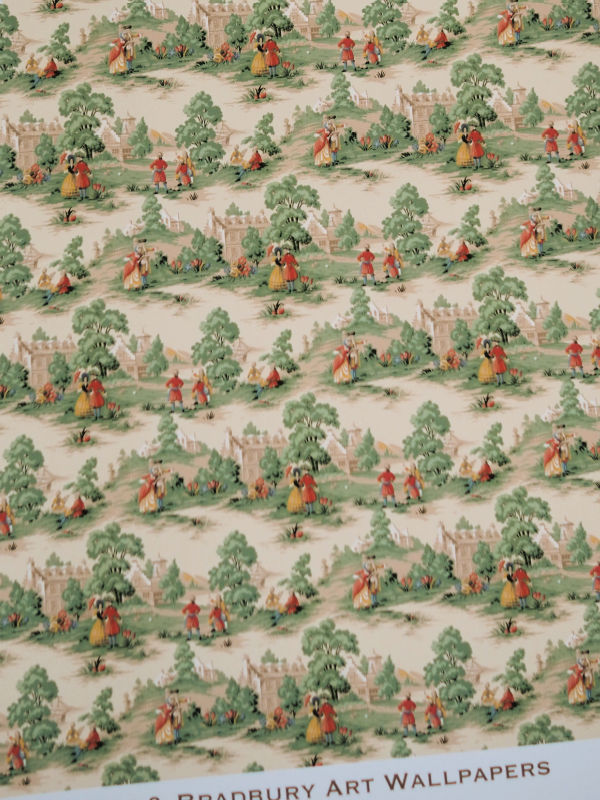
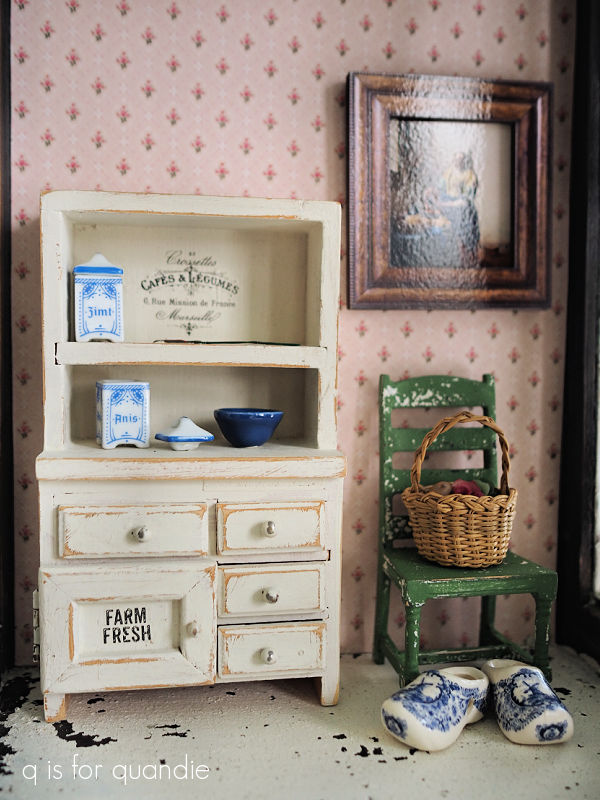
I used the Bradbury & Bradbury Wallflowers on the lower level

and the Bradbury & Bradbury Colonial Williamsburg on the top level.

Isn’t that fantastic?!

I also ordered an unpainted bench and chair from the same vendor.

The sliding door was from Hobby Lobby, and I ended up not being able to use it for this project.  Also, I’m fairly sure the bench was not intended to arrive unassembled,  it was broken.  But it was fairly easy to glue it back together.

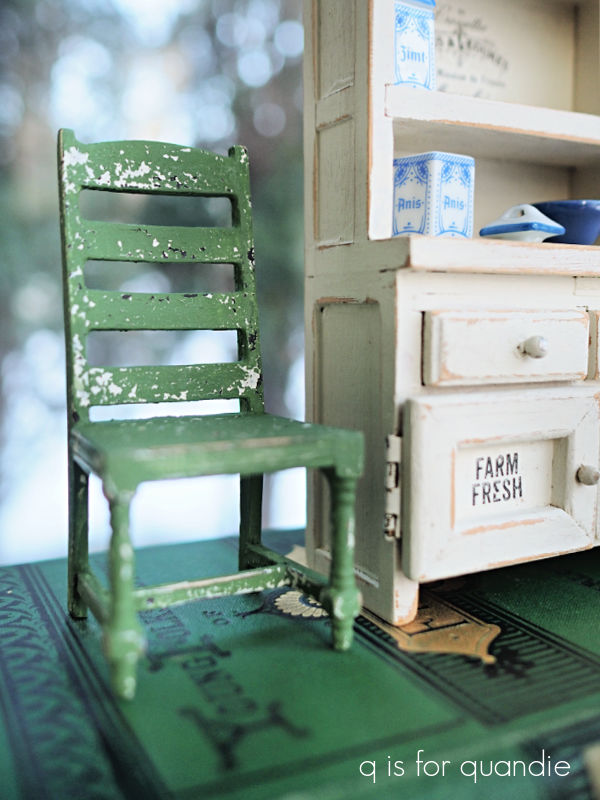
I painted the bench and the chair in Sweet Pickens’ In a Pickle milk paint.

And you’ll remember the little cupboard that I painted a few weeks back, I told you I had a plan for it.

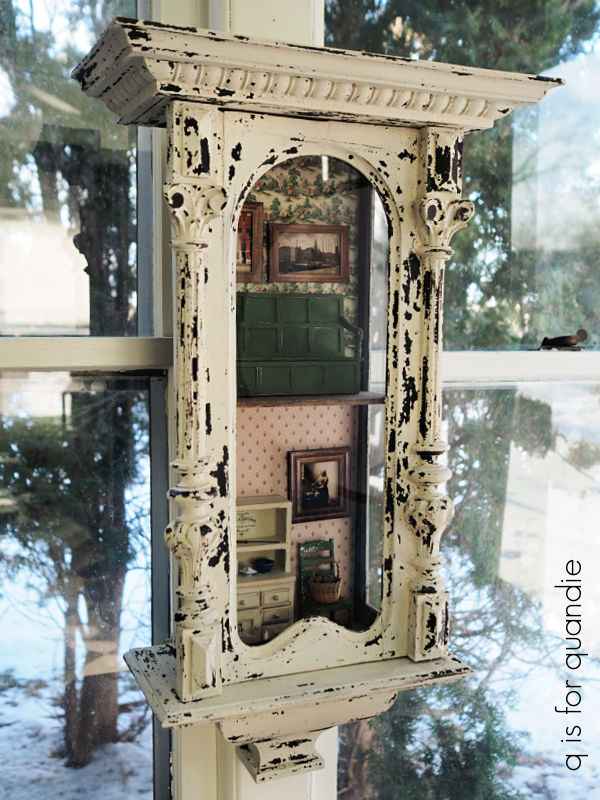
After ‘wallpapering’ the ‘rooms’ and ‘hanging’ my ‘paintings’ with some two-sided tape, I furnished the two levels of my clock case.

They are a little sparsely decorated at the moment, but I figure I can always add to them as I find more fabulous miniatures that I want to include.

I had to hang the clock case out on my front porch to get decent lighting for these photos.

But its real home is hanging in my q branch where it looks amazing on my Globe Artichoke colored walls.

But you’ll just have to take my word for that.

I think it was worth the over 5 year wait to see this project come to fruition, what do you think?

the rijksmuseum.

I was doing a little computer maintenance the other day, backing up photos and whatnot, and I realized that I never shared my visit to the Rijksmuseum in Amsterdam here on the blog.

So, I decided better late than never, right?  I also have additional motivation to share it with you because this visit inspired the project that I’m going to share later this week.

If you’re new here you may not know that I visited the Netherlands and Norway last September.  On one of our days in Amsterdam we headed to the Rijksmuseum.

The Rijksmuseum is the national museum of the Netherlands and is visited by over 1 million people each year.  It was founded in 1798, but the current building that houses it opened in 1885.  A ten year renovation was completed in 2013 to the tune of € 375 million (holy cow!).

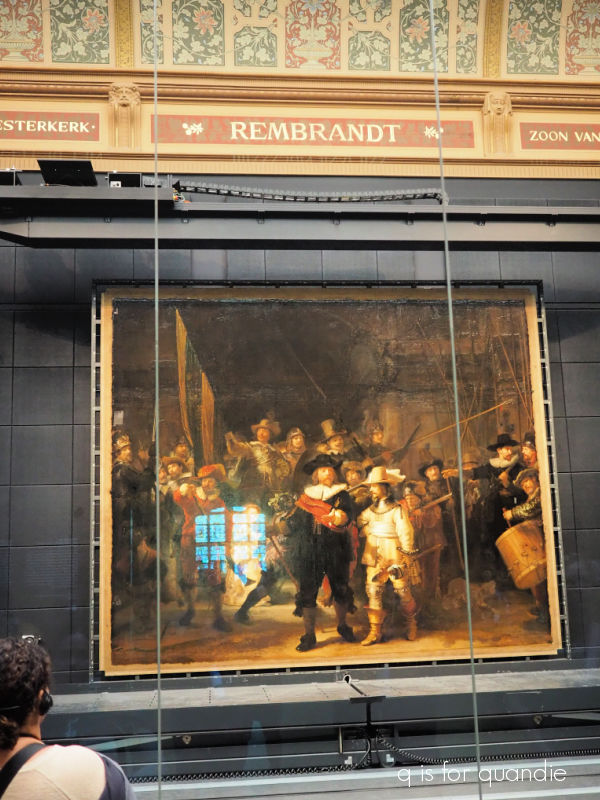
Much like the Mona Lisa at the Louvre, the Rijksmuseum has a very famous painting behind glass called The Night Watch by Rembrandt.  However, at over 14′ wide, this one isn’t quite as small as the Mona Lisa.

It seems to be the main draw and the area around it can get very crowded, so we visited it right at opening time.

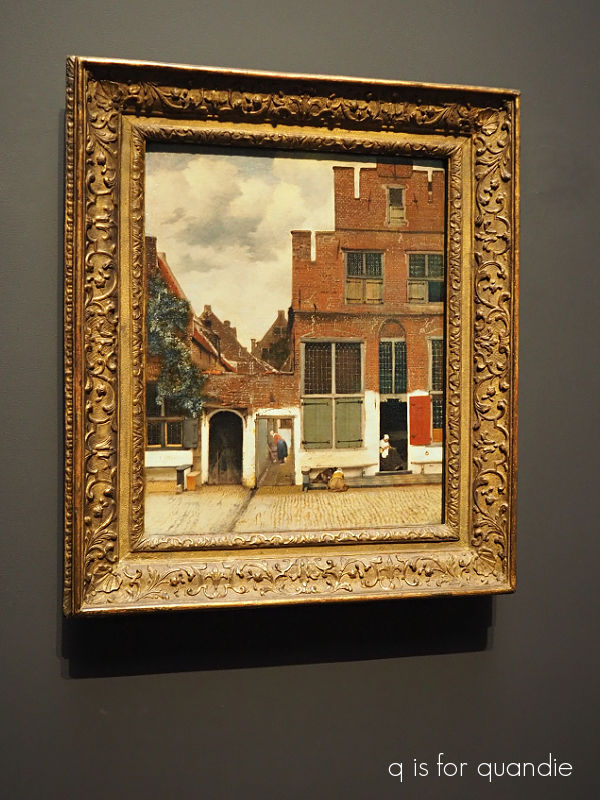
Personally I was more interested in seeing the Vermeer’s (which are pretty small) including The Milkmaid which was painted in 1658.

My favorite of the Vermeer paintings at the Rijksmuseum ended up being The Little Street.

My photo doesn’t really do it justice.  But it appealed to me because looking at it I felt like I could step right into 1650’s Delft (the town depicted).

As much as I enjoyed the various paintings and other artworks in the Rijksmuseum, my main goal was to see the poppenhuizen, or dollhouses.

Dollhouses in this period were typically cabinets that opened to reveal the miniature rooms.  The didn’t necessarily have the miniature exterior features of a house.  They also weren’t toys, but were a hobby of the very wealthy.

In the case of the dollhouse shown above, the cost of creating it was equivalent to the cost of buildng a full-sized canal house at the time.  The owner, Petronella Oortman,  custom ordered each piece to be made out of authentic materials and precisely to scale.  She hired basket weavers to make the baskets, and had linen woven to hang from the drying rack in the attic room shown below.

The china displayed in the kitchen was custom made for Petronella by the East Indies Company.

And isn’t the mural in this room gorgeous?

If you are as fascinated by miniatures as I am, you may also like to see this piece …

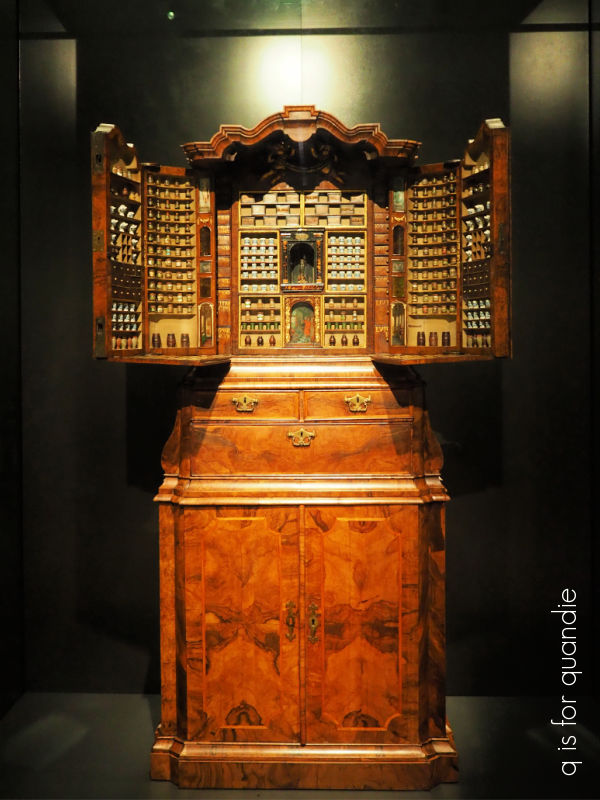
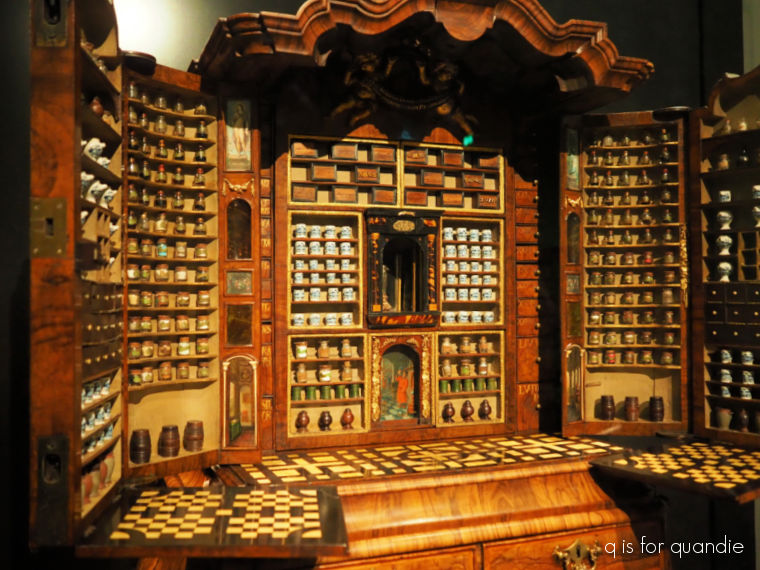
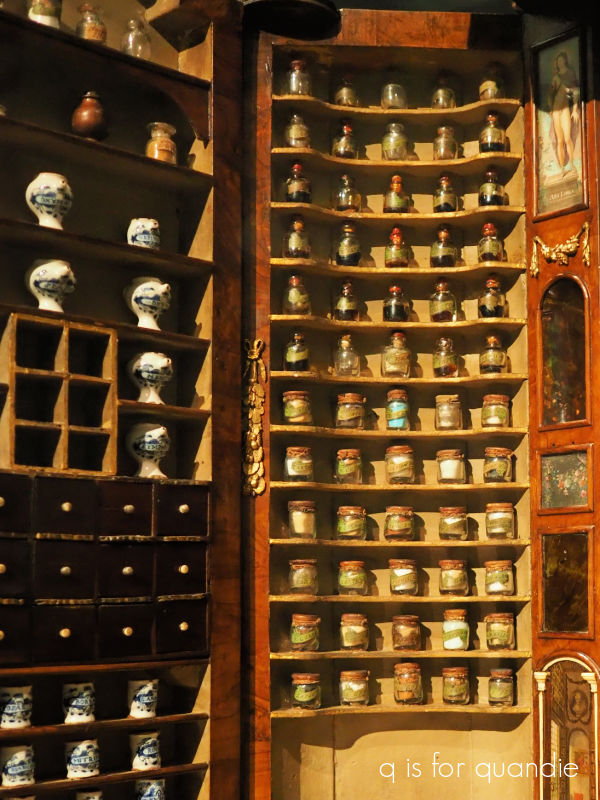
It’s an apothecary cabinet filled with miniature bottles and delft pots.

And they are all filled with samples of various medical ingredients, etc.

Isn’t that fantastic?  Check out this link to see a better photo and to listen to a fragment from the Rijksmuseum audio tour about this piece.

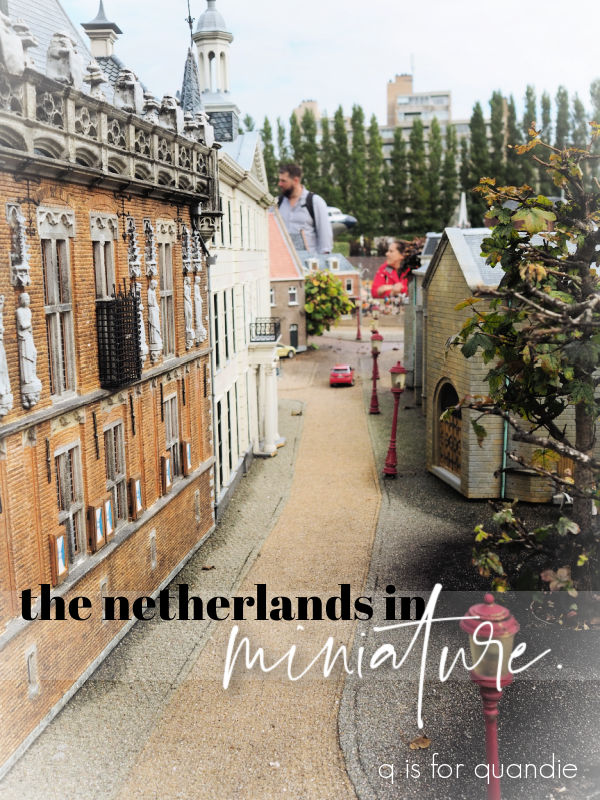
Also, if you are a miniatures enthusiast, you’ll definitely enjoy my post about our visit to Madurodam.

One could spend years trying to see everything in the Rijksmuseum and I’d love to go back someday to see more of it.  Before we headed out I did make a quick pit stop in the gift shop where I picked up some miniature souvenirs to take with me.  They partially inspired the project I’m going to share with you on Friday, so be sure to stay tuned!